When it comes to home improvement, there are many ways to save money and time, such as painting your house yourself or putting up new cupboards without any prior knowledge by utilizing a YouTube tutorial. However, it's easy to get carried away with plans for your house that are way too ambitious and maybe even risky. So, it’s always a good idea to do what you’re doing now – research first and arm yourself with some effective hacks.

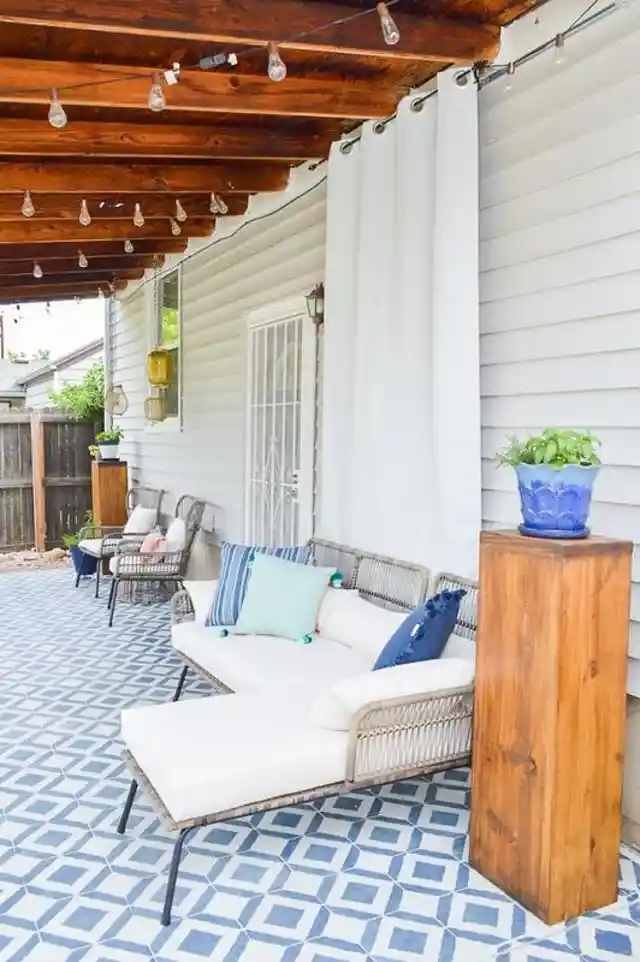
Changing the color of the walls in your house or apartment can have a significant effect on the atmosphere of the place. For example, you could add a cerulean accent wall to your outdoor entertainment area for a sense of peace and tranquility. Perhaps you have some worn-out chairs that could benefit from a fresh coat of paint or varnish. Regardless of what you're working on, the following hacks will help you do a perfectly professional job.
Reusable paint trays
One of the most challenging aspects of painting your home yourself is that since you are not paying someone to do the job, you will have to deal with clean-up after you have finished the task. Tray, brush, and paint are the essentials for any painting project, but what’s the easiest way to clean them?
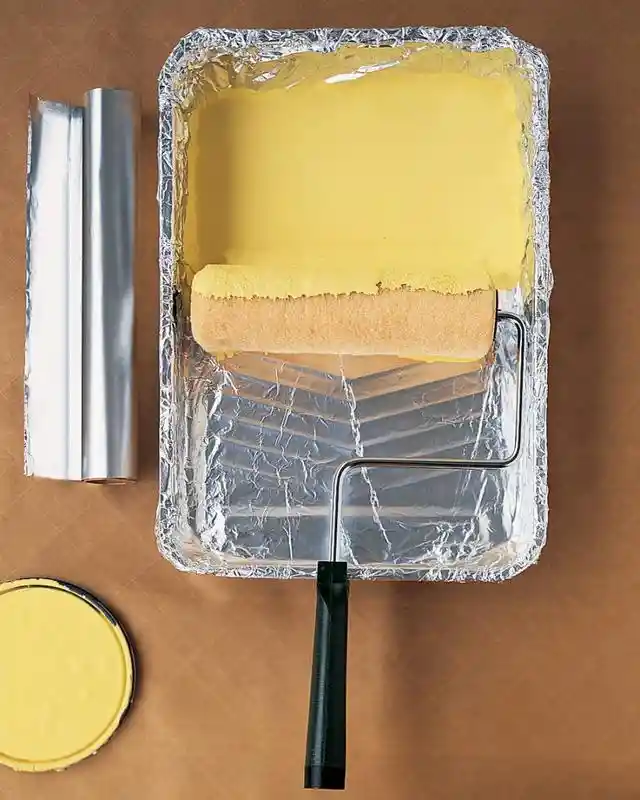

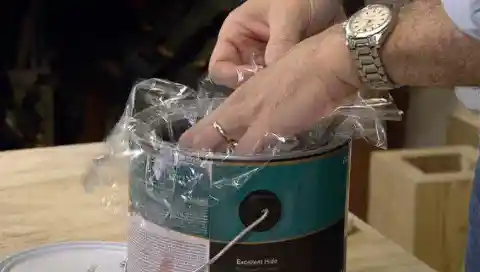
Washing the tray might be a bother, especially if you take extended breaks and the paint dries on it. Fortunately, you can cross off cleaning paint trays from your future to-do list by wrapping the tray with plastic wrap or foil. When you’re done, simply remove the wrap, dispose of it, and clean-up is done!
Clean walls
Just like your new roller brush, your walls will require some preliminary work before you can begin painting them. Of course, no matter how well you clean your home, you would never consider giving your walls a thorough cleaning, would you?
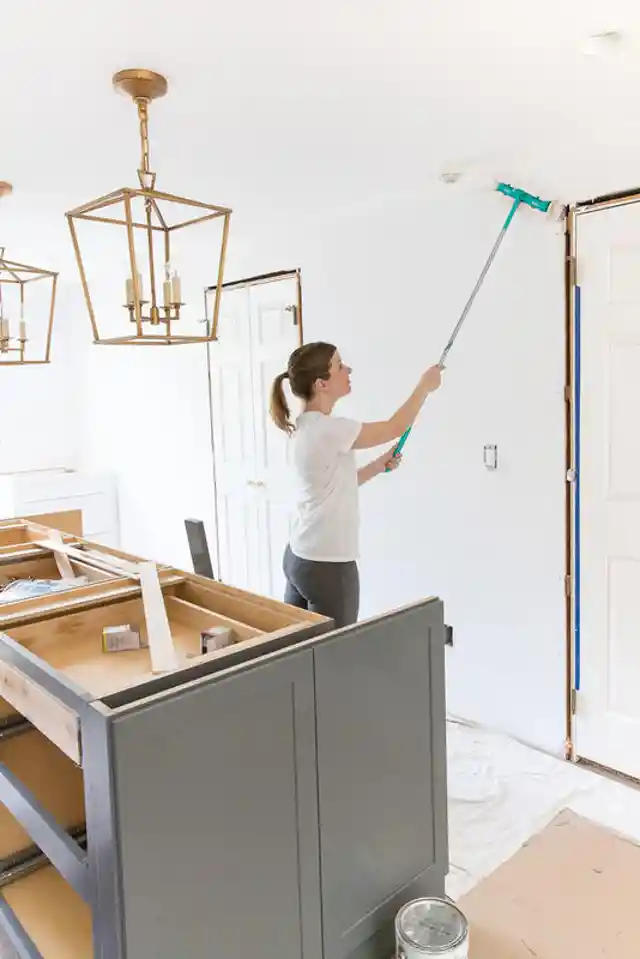

This is precisely what you must do, however, if you want your paint job to look flawless. Compared to the dusty mess you'd otherwise have on your hands, a quick wipe down of the wall you're about to paint is much easier to deal with. All you need is a Swiffer stick.
Paper plate
The best thing about wooden furniture is that it doesn’t have to be perfectly dust-free or polished to look good. However, once it’s showing too much wear and tear, you may want to touch up the paint or varnish. When this job rolls around, pick up some paper plates to make it easier.

Paper plates are an essential tool to have on hand when you need to freshen up your furniture. By placing a plate under each leg of the table or bed frame, you can ensure that your coat is consistent from head to toe. It also gives you the freedom to do the paint job in the backyard as the paper will keep the furniture clear from the grass.
DIY spray can
If you have a few decor items in a specific color, but the shades don't quite match the vibe you want your room to emanate, a fresh coat of paint can be your best friend. Of course, using a paintbrush is a time-consuming job, so many people opt for the swift simplicity of spray paint.

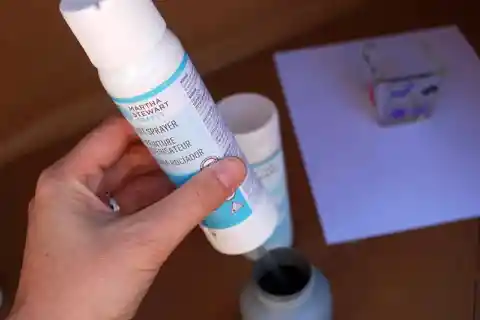
If you can’t find the precise shade of spray paint you desire, there’s no need to be alarmed! This clever DIY spray can solution from Martha Stewart is ready to come to the rescue. It's as simple as mixing the colors to create your perfect shade, following the instructions, and then painting with ease.
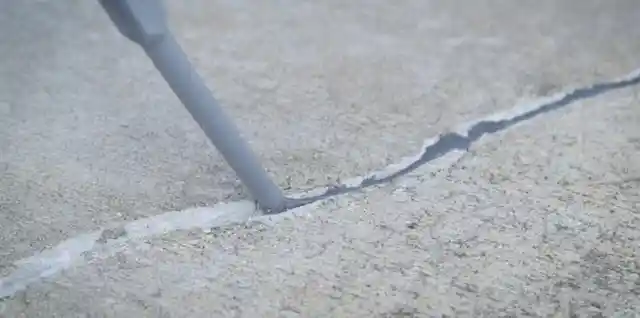
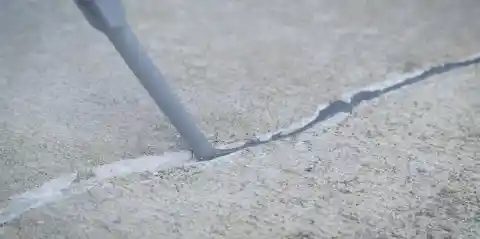
Painted concrete
Concrete can look great when painted. Painting concrete – as in the porous, dusty, and perennially gray stuff that makes up our driveways and outdoor living areas – is an entirely acceptable method of achieving a professional-looking finish. However, it’s a little more tricky to paint than other surfaces.

A unique type of paint is required – concrete paint – which is thinner and capable of penetrating the porous concrete quickly and more thoroughly. So, be sure to arm yourself with the right paint and the right tools before starting your project.
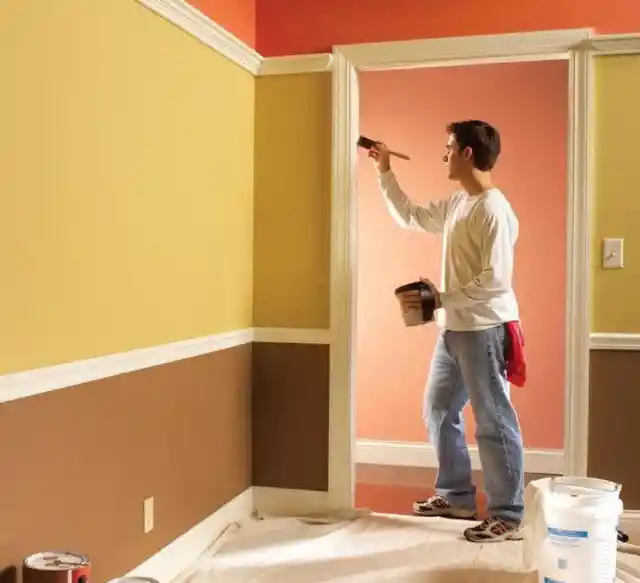
Professional painting techniques
When painting a blank wall, it may be tempting to start slathering paint anywhere you choose, but remember that this is a job that demands technique. There’s a reason why many people choose to leave this task in the hands of professionals – it’s not as simple as it looks.


The W or Zig-Zag way of applying paint with a roller is one of many procedures that experienced painters know and that we should certainly follow. It will give you a smoother finish with the least amount of work.
Paint pads are the best!
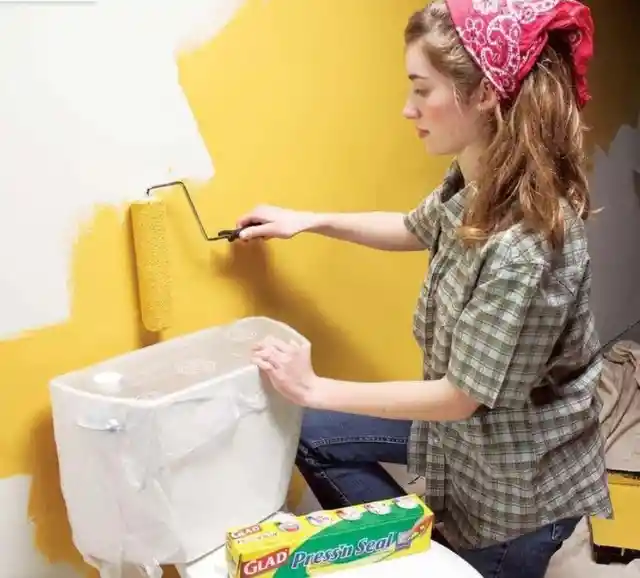
There's no point in removing everything from a room simply to paint it. Indeed, in some rooms, you don’t even have the ability to move everything – think toilets and other built-ins that just should not be removed from where they are.
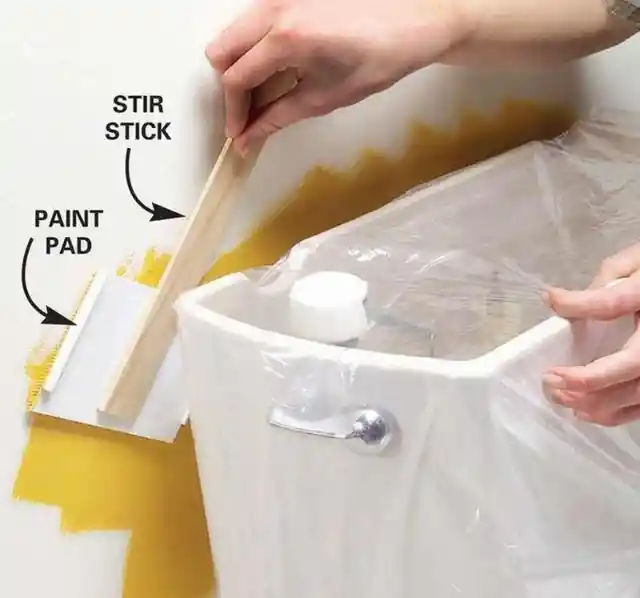

Using a paint pad linked to a stick is the best option if you have very little space with which to work. You should also cover the toilet, built-in, or other immovable items with plastic or masking tape to ensure you don’t get any paint on its surface.
Use protection
Anyone who has dyed their hair at home knows how frustrating it can be when some of the dye stains your ear, forehead, or someplace else that wasn't meant to be colored! It spreads everywhere. Painting comes with the same issues, but thankfully, that means we can use the same hacks to save the day!
You can use Vaseline to prevent stains in areas that need to be guarded. With this handy little trick, you can protect hinges, screws, and sockets in no time at all. If any paint splashes on the Vaseline-protected surfaces, you can simply wipe it all away along with the coating of petroleum jelly.
Cleansing wipes get the job done
If a few stray drops of paint escape your notice and land on the floor, it can be next to impossible to clean them up. Rogue paint can cause a lot of problems. If you step on it, you may even trek paint all over the house, compounding your troubles. Thankfully, we have a solution!

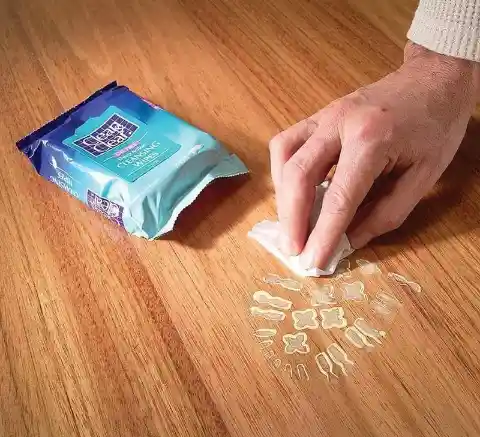
Using a mop could amplify the smear and damage the mop or your flooring. Instead, use the same type of face cleansing wipes you’d use for acne. These are readily available at pharmacies and supermarkets, and you can remove paint with them because the pad solution is alcohol-based. It can also be used to clean up larger, dried-out paint splatters.
Avoid spills in the first place
Let us begin by stating that painting is a messy activity. However, just because you're taking on a messy task doesn't mean it has to be a headache. We don't have to live with the mess we've come to accept as a typical outcome.
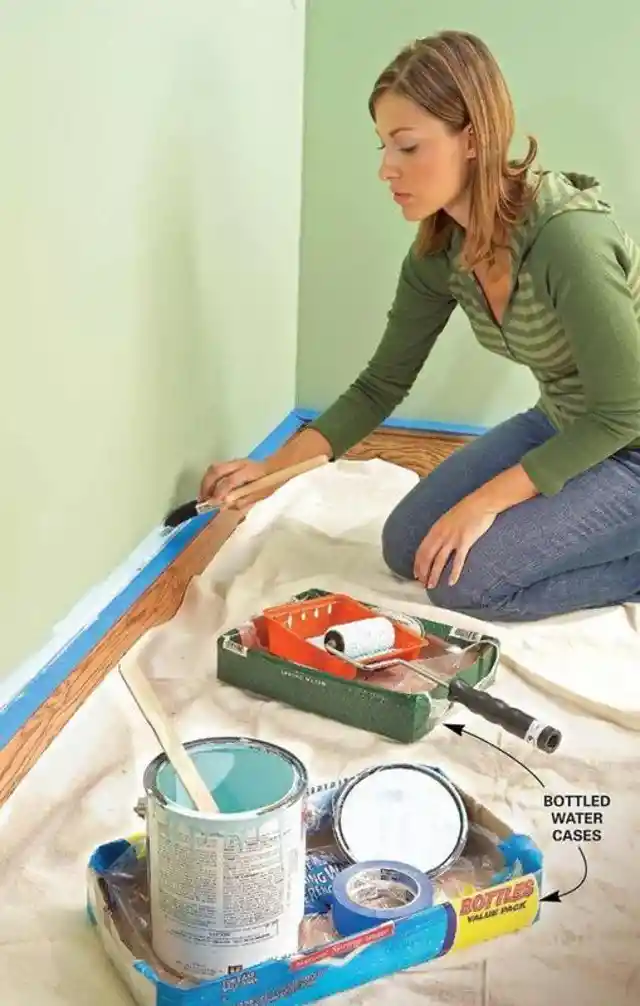
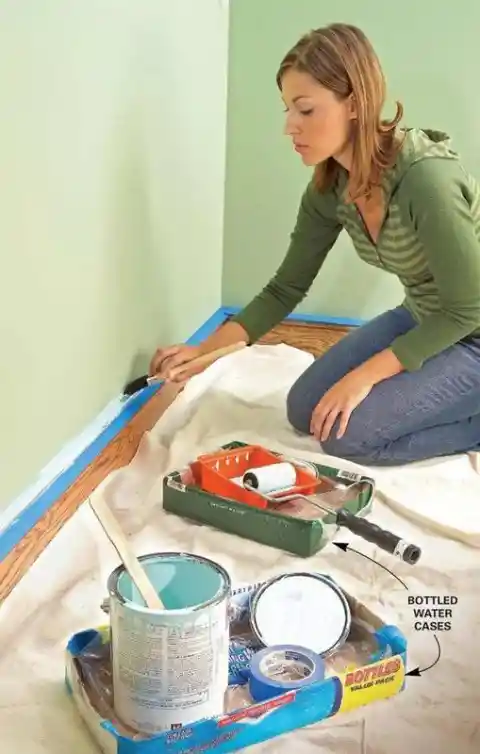
You would most likely prefer to take a long, loving look at your finished work and spend only a few minutes cleaning it up. To make this happen, store your paint supplies in a soda can or water bottle case to prevent any unnecessary paint spills.
Smells like vanilla
Paint has a distinct aroma that some people find strangely enticing. However, it's not everyone's cup of tea. If you find the smell unpleasant and overwhelming, we have a brilliant way for you to turn the situation around.

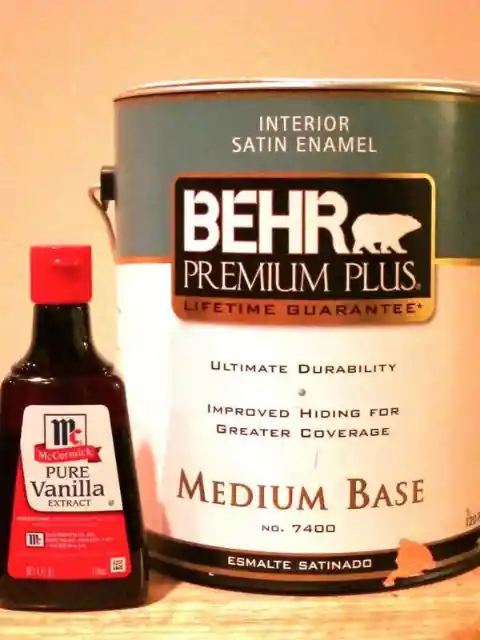
Add a tablespoon of vanilla extract to each gallon of paint before applying it to the walls to mask the unpleasant odor while also adding a delectable vanilla flavor to your walls. Just don’t blame us if you start craving cupcakes halfway through the job!
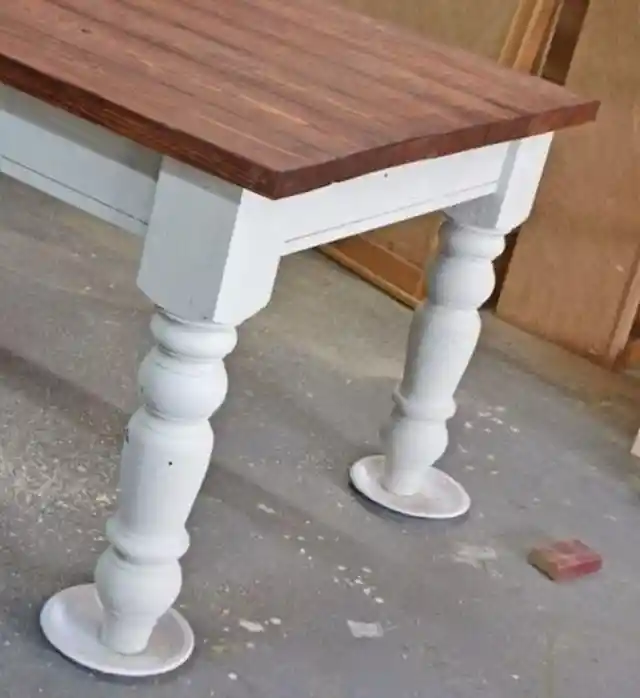
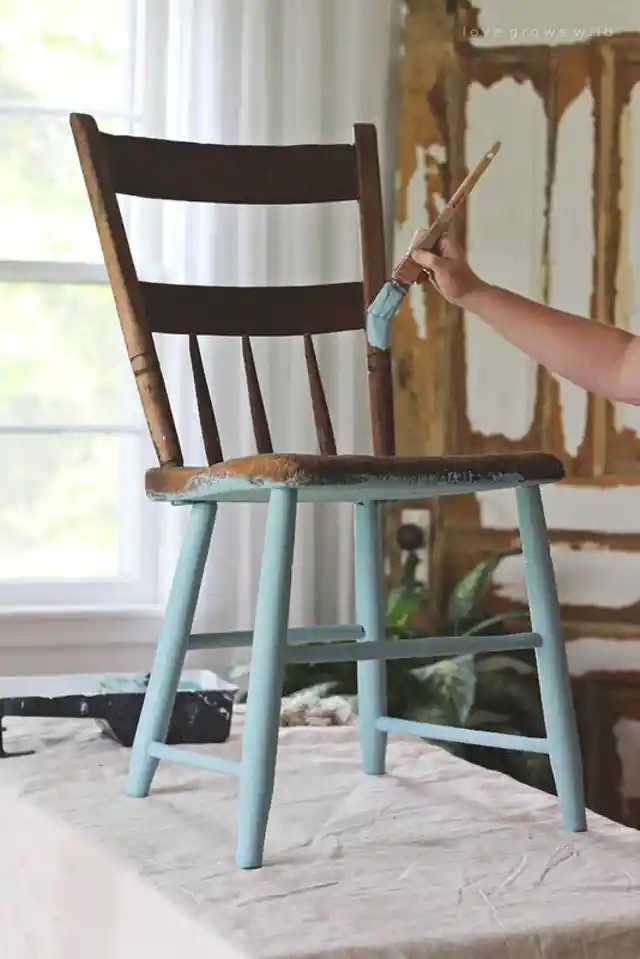
Nailed it!
When you have to repaint an old but cherished family dining table or Grandma's favorite reading chair, you will almost certainly run into a problem if you begin working from the top and then flip the table over.

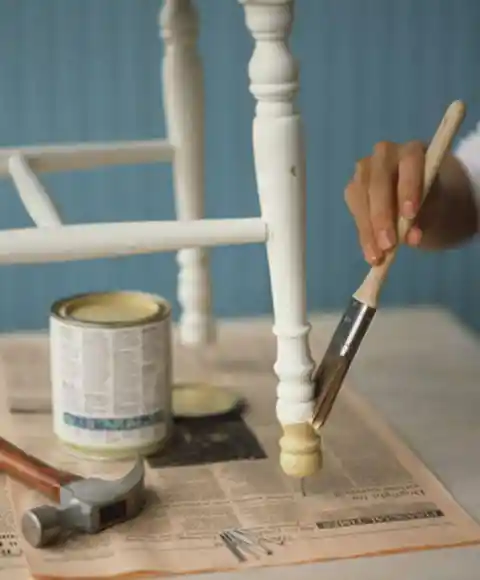
When a piece of furniture is turned upside down, the laws of gravity are not on its side. Of course, we have a solution! You can paint the chair or table legs without having to flip them if you hammer a nail into the bottom of the chair or table legs – what a great idea.
Angled brush
Trying to paint trim, such as the molding around door frames and fireplaces, can be challenging. The purely decorative border certainly needs to be painted well, but the folds and patterns make it a difficult task.
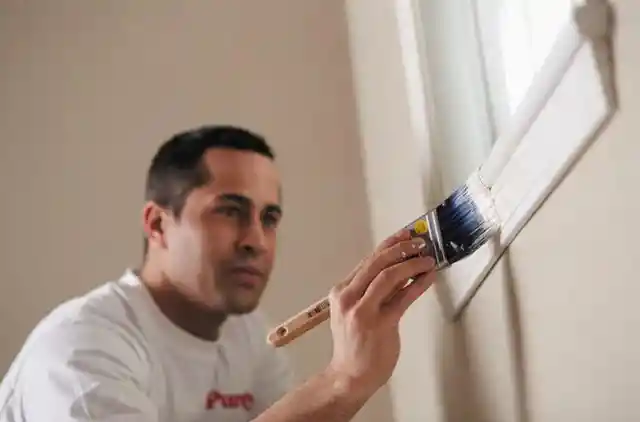
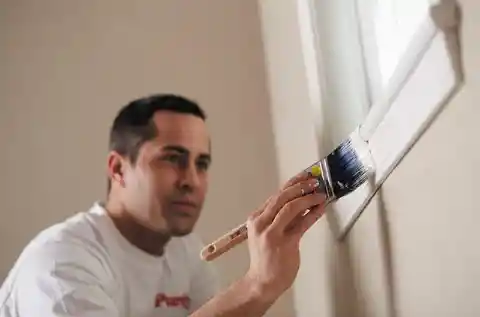
It’s far easier to avoid making mistakes if you use an angled brush, which will let you cover every curve and corner with fewer errors and eliminate the need for protective tape. In addition, the angled brush makes it easier for the paint to go into all the nooks and crannies.
DIY brush stand
Indescribable annoyance ensues when you lay down your brush after a long day of painting, only to discover a few moments later that you've unintentionally placed the paint-filled brush on something you didn't intend to touch!
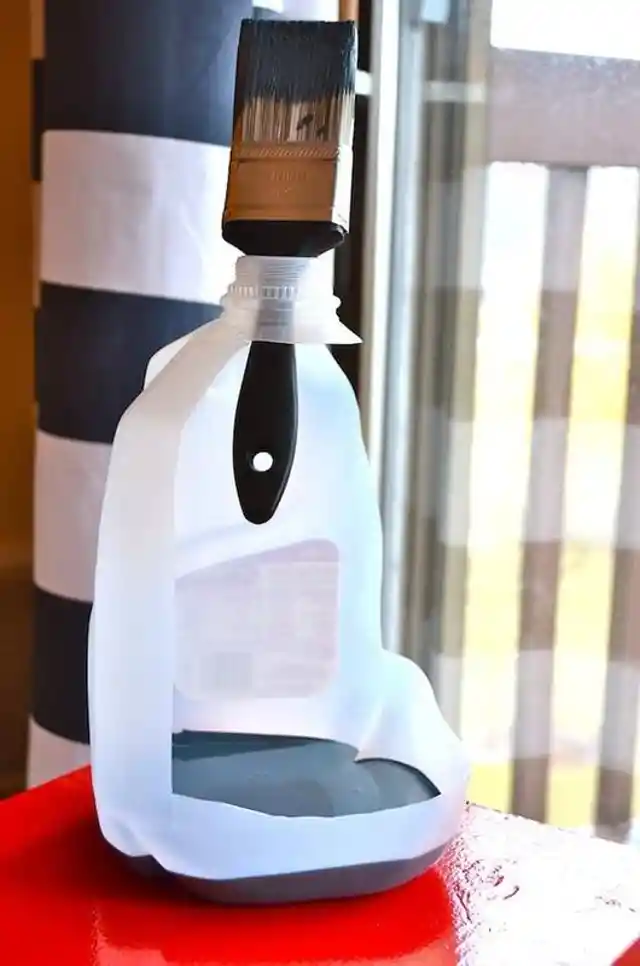

The answer to this specific dilemma is concealed someplace within your refrigerator. Once you've emptied your milk or juice jug, cut a portion from one side of it to allow you to rest your brush in the spout while you fill the bottom section with paint.
Wipe away any excess
It's possible that painting trim, even with an angled brush, will result in some stains or errant drops of paint that drip off the brush. You may even leave an accidental stroke of paint on the surface surrounding the trim if you're not cautious.

However, there is a simple solution to any such mishaps. A damp cloth is all that's needed to rapidly remove any paint drops or swatches that are messing up the final look. It's easy to use, and it works. You just have to get to the drip before it dried!
Latex paint
You may be surprised to learn that latex paint does not contain latex. Painting big surfaces, such as those found in commercial settings, is frequently done with water-based paint. The paint is an excellent choice for home improvement projects. However, it does occasionally clump.
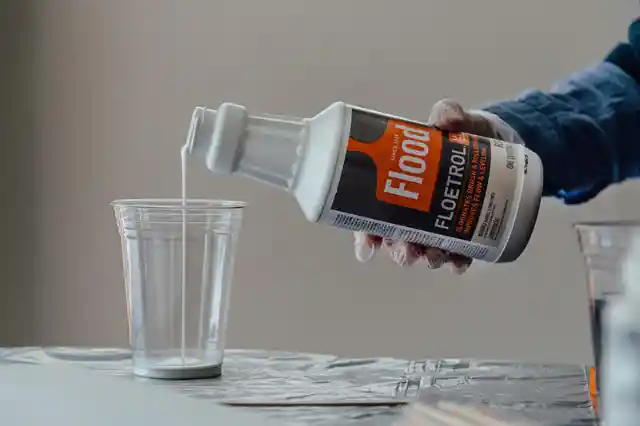

The best option is to dilute the paint with thinner, but not just any paint thinner will do. Some can actually harm the paint's properties. So instead, use Flood Floetrol to achieve a smoother finish when diluting latex paint.
Latex or oil-based?
Paint, in a sense, can be thought of as the equivalent of cosmetics for a home. To achieve a stunning result, you'll need specific mixes of products – just as you do with makeup. You also need to have an idea of what type of product has already been used to know which one is ideally suited for the job. How can you know if your house is painted with oil-based or latex paint?
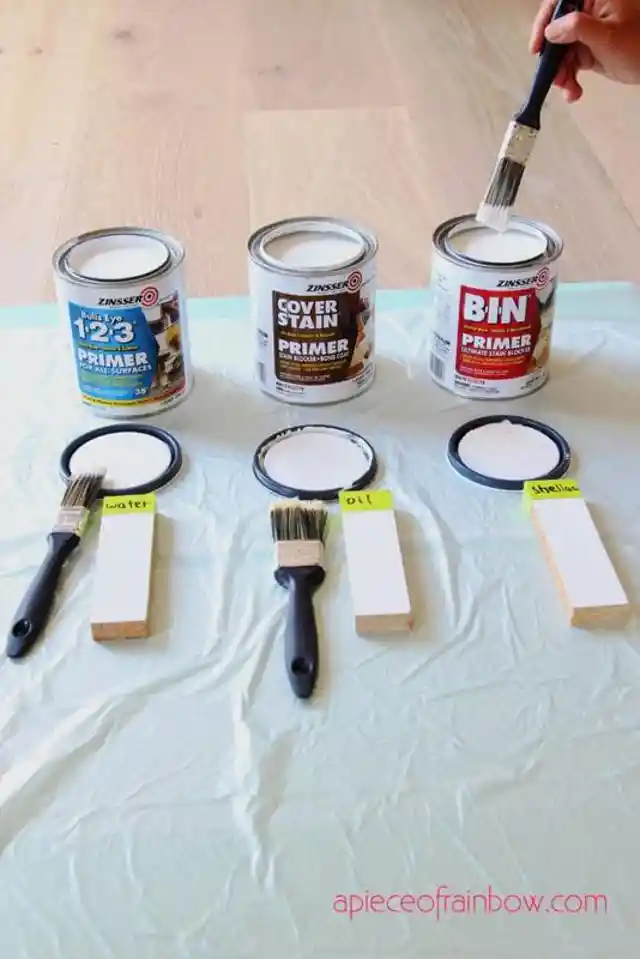
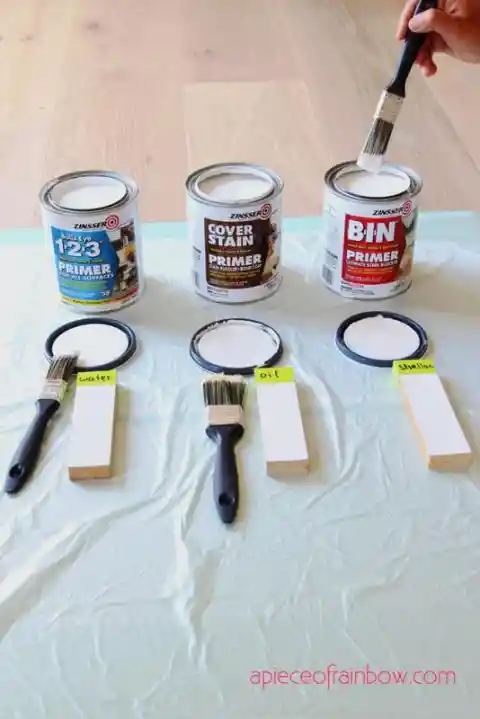
Determine what kind you already own before making a purchase. You can use a cotton ball soaked in rubbing alcohol to wipe down your wall. Paint that rubs off on cotton is usually latex, while oil-based paint won’t budge.
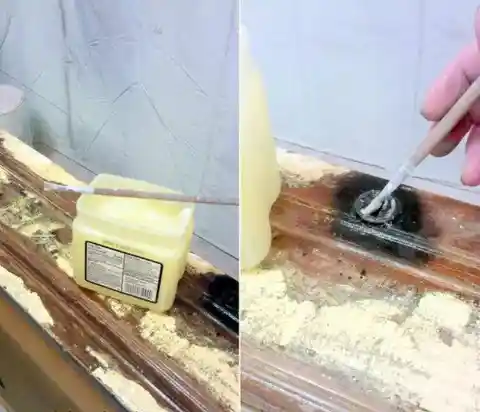
Citristrip to the rescue
Citristrip offers an easy way to remove the paint or varnish-coated finish from old furniture in order to restore it. This can otherwise be a lengthy and grueling process that necessitates the use of toxic chemical treatments. However, with Citristrip on hand, the job is surprisingly easy.
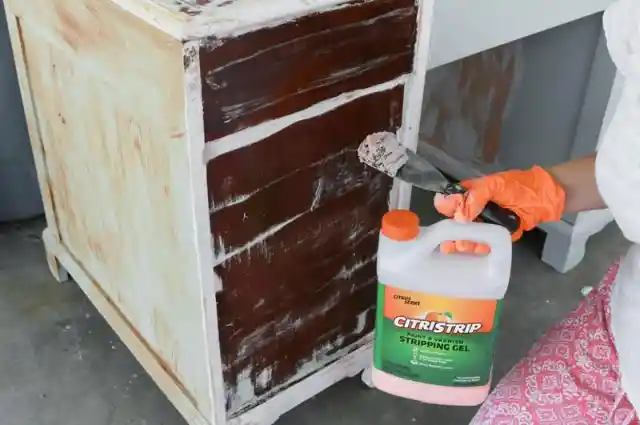

Citristrip simplifies the process and protects you from caustic substances. It's also perfect for indoor use because it doesn't emit any dangerous or unpleasant odors. Apply the Citristrip, wrap the furniture in plastic, and remove it the next day.
One way only
There are numerous methods for applying paint. While there are plenty of tips and tricks available for painting walls, some of which we’ve already covered, you may be searching for help painting other items around the house, such as furniture and decor items. We have some tips for these more delicate jobs too!

When painting, bold and confident strokes are advised since this reduces the risk of needing to paint more layers over the top. It’s also the best way to get an even finish. When painting furniture, it's best to paint in a single direction to avoid leaving behind any streaks.
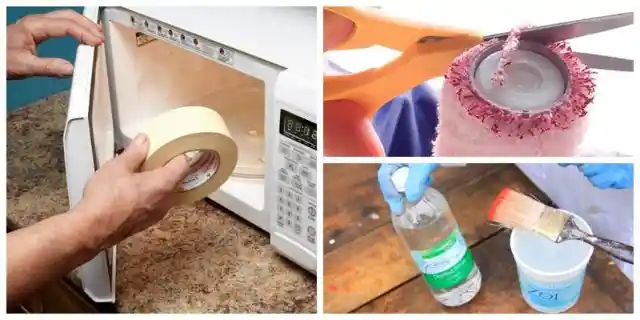
Re-stick the tape
When it comes to painting necessities, a roll of tape is one of those things that you definitely must have on hand. Amateur and professional painters alike can apply it as a paint guide and a means of assuring uniform and tidy paint finishes.
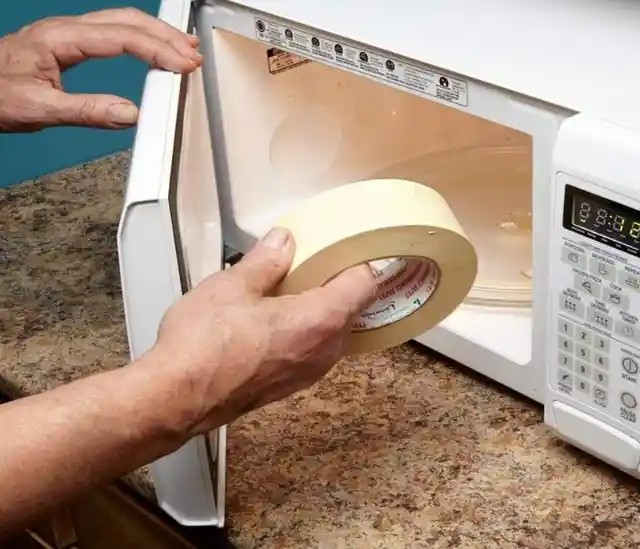

Preparation is vital, so it helps to always have a roll of masking tape on hand. Of course, if it’s a while between jobs, you may find that your tape has dried out and lost its stickiness. To remedy this, microwave it for 10 seconds. This will soften the glue and restore their product's usability.
A quick fix
If you want to maintain your house and ensure it’s always looking its best, you must take care of your paintwork. If you have children or dogs that are prone to mischief, it's a good idea to have a quick solution on hand.
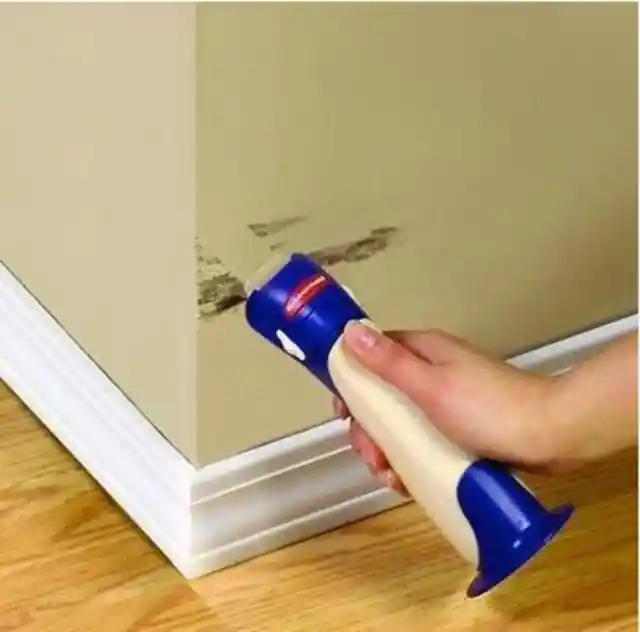

Once a paint job is completed, the Rubbermaid Paint Buddy is an excellent tool for repairing flaws, dents, and scratches. It's also an excellent method to keep track of your paint supplies. This may be your best option if you've chosen a blended color that's difficult to replicate.
Precision tips
Are you a perfectionist who takes great satisfaction in flawlessly done works that yield excellent results? Do droplets of spilled paint make you secretly furious as they glower from the corner of the room, ruining an otherwise neatly painted space? We have a hack for you!
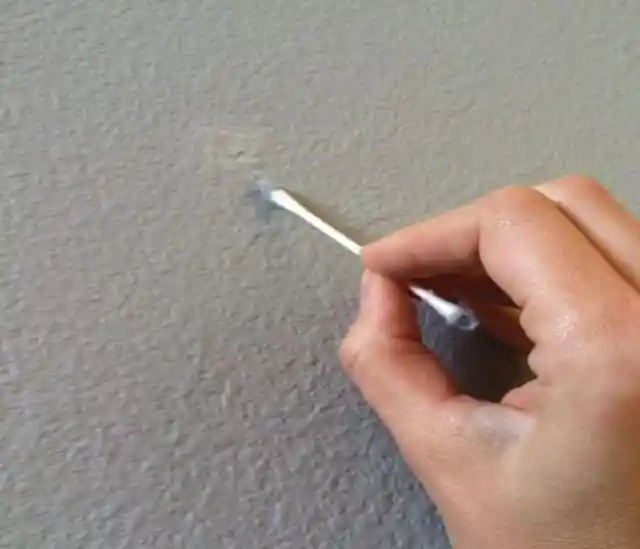
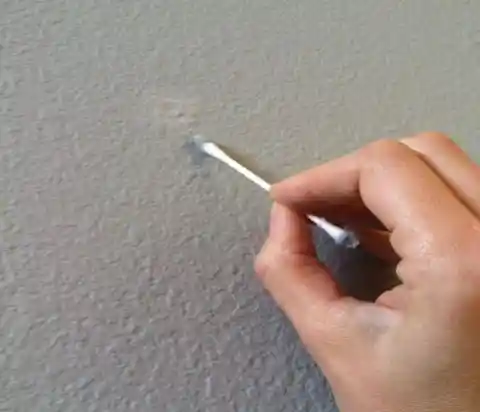
For minor streaks or spots of spilled paint, you can make your own eraser tool by soaking cotton-tip buds in paint stripper. When applied with patience and precision, a Q-tip can remove paint mistakes and save your sanity.
Painting with a pen
When it comes to more complicated paint damage, you'll need specialized tools to fix the situation. However, if you only need to make minor alterations, cotton-tip buds or the Rubbermaid Paint Buddy may not be the most practical options for you.


There's a new product out there called the Slobproof pen that can help you out. Your next paint job won't be harmed by using it as a Sharpie to fill in any chips that may appear between now and then.
Wipe it off
Before we begin painting, it is usual practice to wipe the surplus paint from the brush. However, using the rim of a paint can or container to wipe the brush clean can lead to a caked-up mess that makes it hard to close the lid properly. In turn, this can leave you with a tin of dried-up paint that’s no good to anyone.

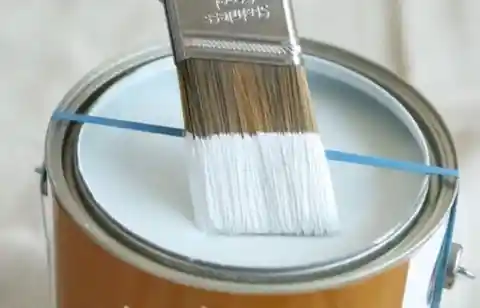
There's a simple tip you can use to keep paint splatter and buildup to a minimum. Instead of rubbing the brush on the rim of the paint tin, secure a rubber band across the top of the container to wipe the paintbrush on instead.
Smooth like butter
Plaster is a substance that is used to coat walls. While it isn't as popular as it once was, it is still a viable choice. It has a paste-like consistency that forms a chalky coating on the wall when applied.


Self-leveling paint is an excellent equalizer when working with such a medium. As its name suggests, this product is designed to level itself out when applied. Thus, the complexity of working with plaster can, quite literally, be smoothed out, leaving you with a perfectly even finish.
Perfect prepping
As with most DIY jobs, the best approach to ensure that the wonderful color you choose will stay in immaculate condition is to clean and treat the surface before you start. This applies to everything from tiny keepsake boxes to the exterior walls of your house.
You can use white vinegar to thoroughly clean most surfaces, including concrete. Indeed, it is particularly helpful for prepping concrete as it enhances the adherence of the specialized concrete paint and reduces the risk of cracking. To ensure a long-lasting finish, concrete epoxy or polyurethane can be applied to fill in any existing cracks.
Paper bags
It's always good to perform one final quality check before putting everything back together once the paint has dried. A high-quality polish can only be achieved if the surface is perfectly smooth. We don't want any grit or bumps.
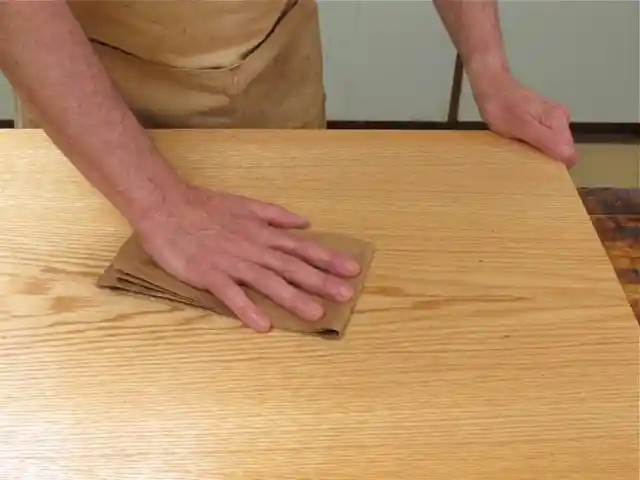

Using sandpaper to sand down the surface isn't the ideal option because it will also remove the paint. However, a brown paper bag is suitable for this kind of task. Rub it over the surface, and you're ready to go.
Preventing cracks
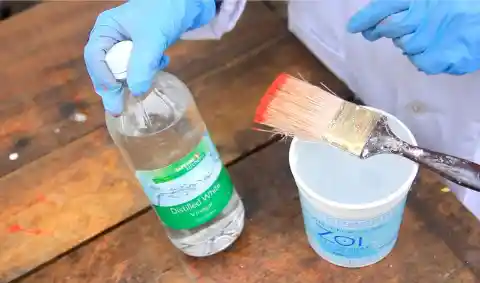
Metal, despite its strength, is not the most long-lasting material due to its susceptibility to corrosion and rust. As a result, metal equipment and utensils that are meant to be used outdoors must be coated or painted.

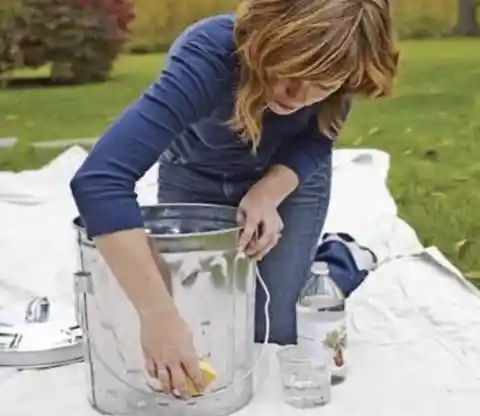
When painting on metal, there's a specific technique that relies on the use of vinegar once again. Paint applied to metal is prone to cracking, which exposes the metal to rust. To avoid cracks and rust, all you need to do is rub it with vinegar first.
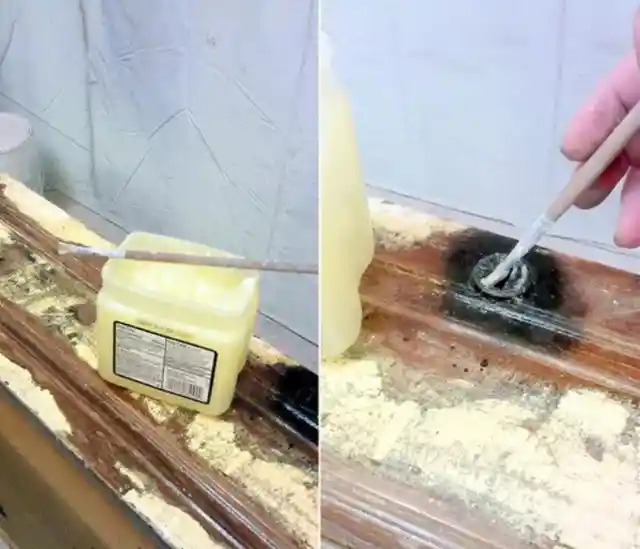
Furniture filler
When painting something, it's vital to ensure that the surface is as smooth as possible so that you can get the most excellent results. Cracks, scratches, and other imperfections don't exactly lend themselves to a fantastic paint job. However, when it comes to antique furniture, you get a little bit of all of these difficult factors! So, what should you do?

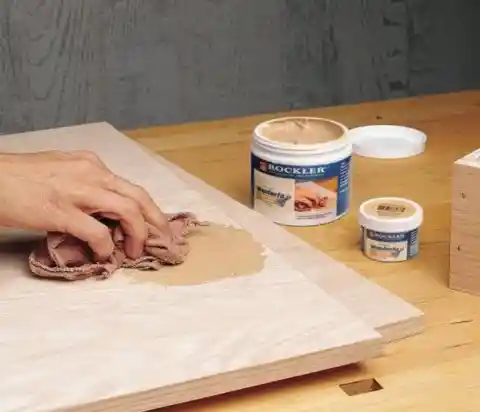
Before painting antique furniture, Elmer's Wood Filler is an excellent substance to use as a priming treatment. As implied by the product's name, it fills in the wood's scratches, chinks, and gaps. Once you've sanded the surface, you'll be able to paint on it easily.
Brush off
Suppose you've completed a painting project and are in the midst of the clean-up. To finish the job, you would have to remove the paint from each brush and then wipe away all the splatters. That sure does sound like a lot of fiddly work! Surely there’s a better way…

Typically, one would use paint thinner or another suitable solvent to loosen the paint from the brushes. However, a 30-minute soak in a tub of hot vinegar will do the trick. Then, restore each brush to as-new condition by washing it in soapy water and rinsing well.
Excess paint
The following tip is perfect for anyone constantly looking for ways to save money around the house or who simply enjoys learning about new ways to keep things running efficiently. Keep your hard-earned money in your pocket, and don't waste one more drop of paint!
A lot of paint gets absorbed by roller brushes. So when you're done with your masterpiece, you'll have far more paint than you realize soaked into the roller. Fortunately, scraping the roller with a bench scraper will allow you to remove a significant amount of paint.
Wrapping it up
Are you aware of the versatility of plastic wrap? 90% of our day-to-day difficulties can be solved with a roll of this marvelous stuff. Although that's a bit of an exaggeration, we're confident that we can reach a dozen or more plastic-wrap life hacks if we work hard enough. It's a useful piece of equipment for any home.

Wrapping anything with plastic is an inexpensive and convenient technique for protecting it from paint. It adheres to the surface of the object without consuming additional space. It's also simple to get rid of once you're finished.
Keep it inside the box
What's so great about spray paint is that it's effective and it goes everywhere. Of course, that means it’s also at risk of spreading out beyond the bounds of your project. It takes a lot of care and attention to ensure you don’t accidentally paint everything in the vicinity. To make this job easier, we have a brilliant hack.
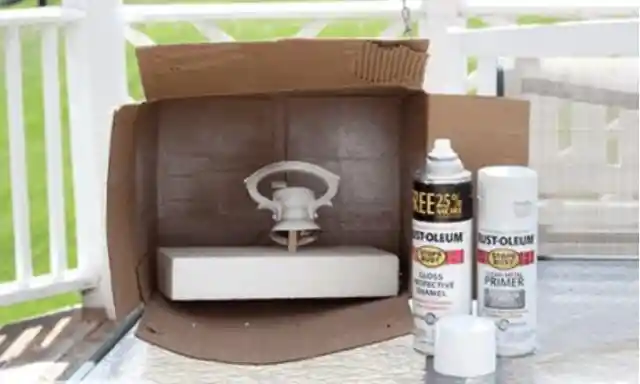

Use an old cardboard box to create your own mini spray-painting booth. You can put anything you need to paint in the box, and then simply spray away. As shown in the image, you can use florist foam to create a base on which to sit the object you’re painting.
Or maybe a tent
Larger goods may necessitate the use of a more substantial setup. Rest easy, knowing it is definitely worth the effort it takes to set up. Any spray painting endeavor that isn't adequately prepared for will result in a much larger cleanup job.
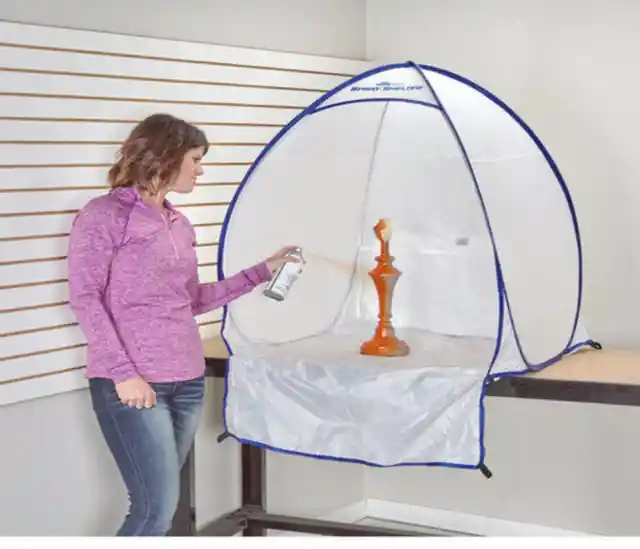

A simple pop-up beach tent is ideal in this situation. Everything larger than a cardboard box can fit in the tent, and when you're done painting it, you can just fold the tent up and enjoy the easiest clean-up ever!
Clean the walls
It has been repeatedly advised that you should thoroughly clean and dust any surface you intend to paint before beginning the process. Unfortunately, greasiness is also a problem with walls, as we have discovered, because they are rarely cleaned.
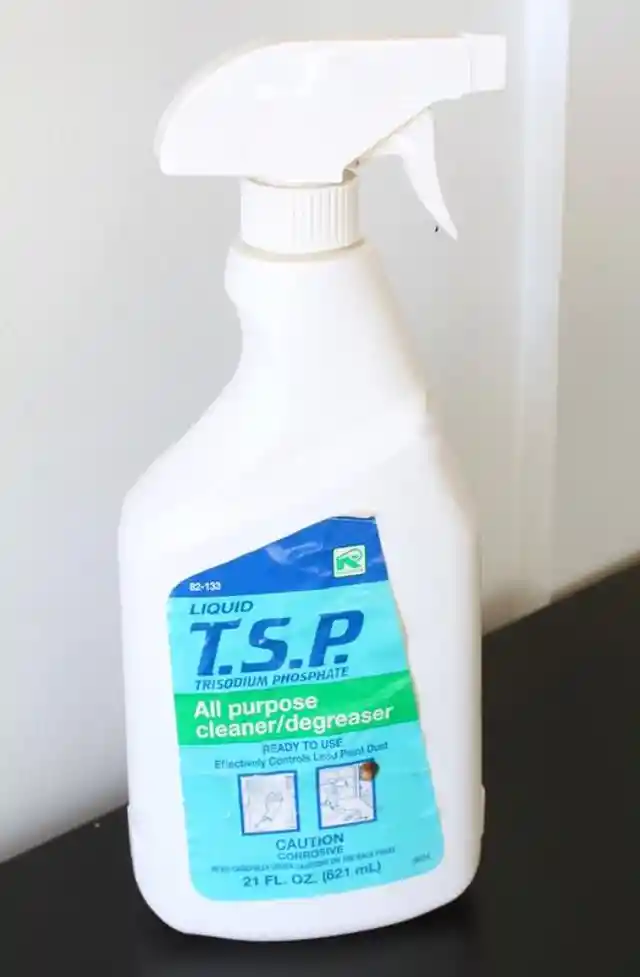

It is recommended to use liquid TSP – a heavy-duty all-purpose cleaner – to remove deposits of oily dirt and grime from inside and outside a structure. Though this takes a little extra work, the paint will stick better if the surface is cleaned thoroughly.
Save it for later
We've talked about how to maintain and preserve various brush types, from angled brushes to rollers. Of course, it is possible to store unique hues in smaller cans, but what about the containers of paint we have left – the base coats and latex, among other things?

In order to deal with these temperamental paints, simply cover them in plastic wrap. Without it, the paint will dry. With a plastic covering, however, the products will be perfectly preserved until you need them again.
A little bit of gold
Gold accents make a massive difference to the overall look of any item of furniture. With a little brush and some gold spray, you can meticulously add all the little details, or you can paint the whole thing at once.
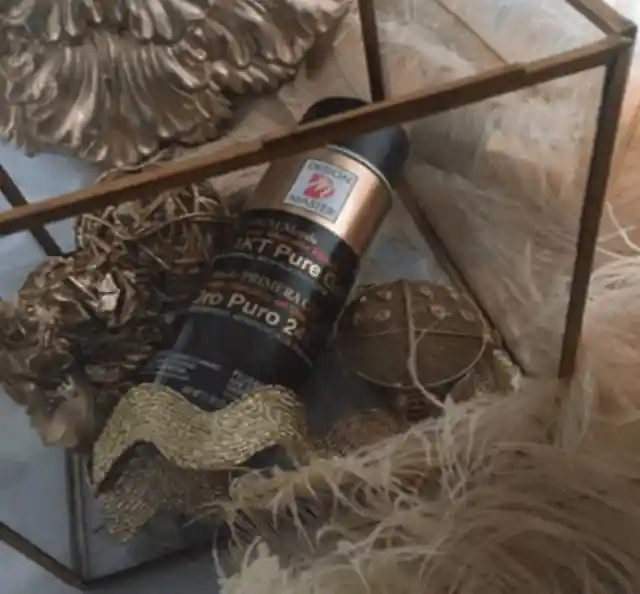
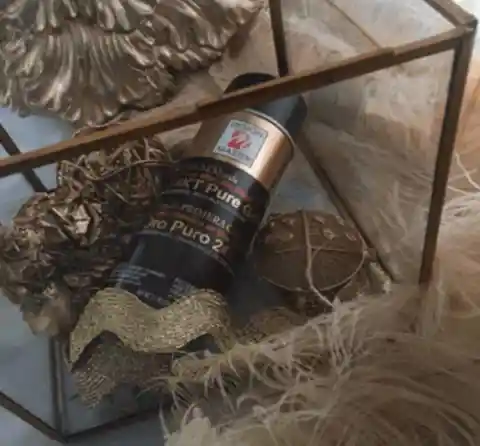
Create a chic and timeless look with gold-sprayed accents for a touch of class and elegance. We recommend using a metallic gold spray to achieve the most realistic gold look. Another tip: spray paints with a bit of graininess will help enhance the effect.
Airlock bag benefits
Air exposure is wet paint's worst enemy. This makes it tough to take breaks from a painting job as any little mistakes will be a hassle to fix if they’re allowed to dry. Paintbrushes are no exception and dry up rapidly if you're taking a break from painting.

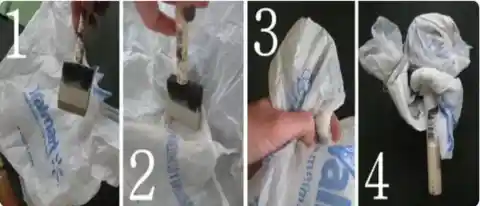
A plastic bag and rubber band can save the day when you need to store your paintbrush. In order to keep your brush fresh, all you have to do is put it in a clear ziplock bag and secure it with elastic bands.
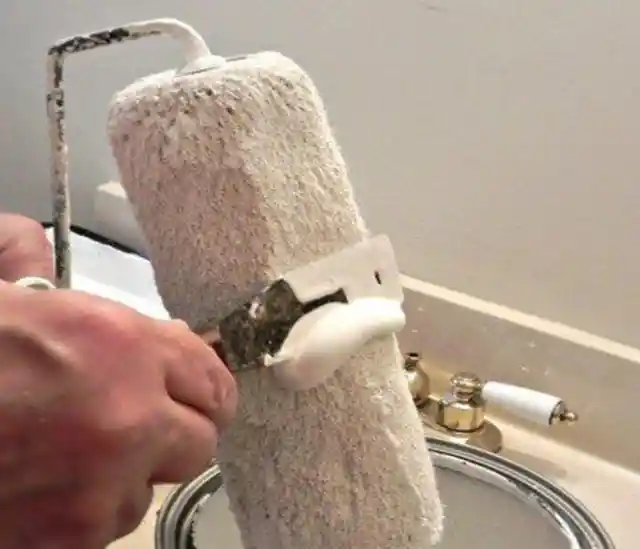
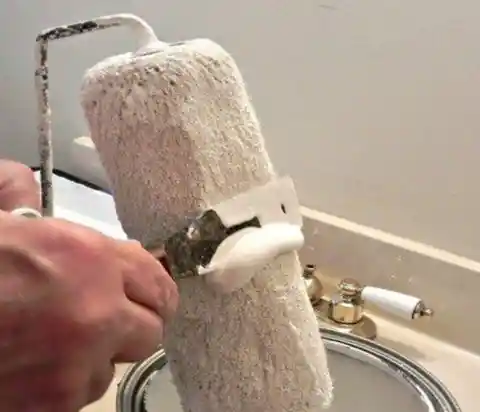
Trim the roller
There is quite a bit of prep work involved in ensuring that your paint roller does not ruin your wall rather than enhance it. After you’ve cleaned the roller and allowed it to dry, use a lint roller to remove any lint that may have gotten on the surface.
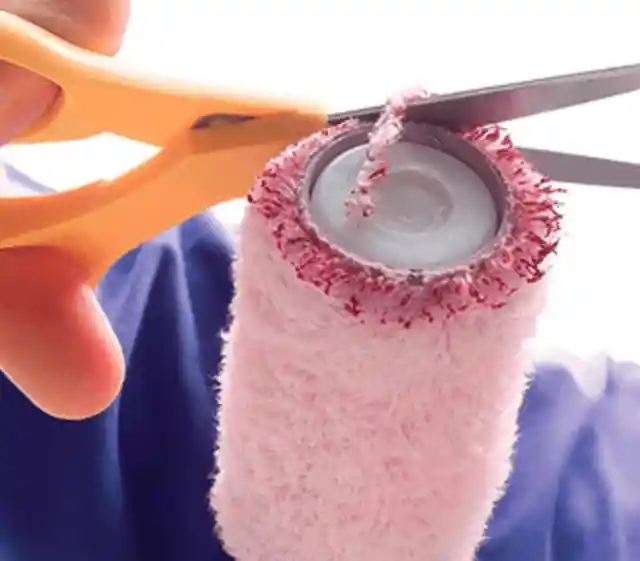

You can't exactly replace a roller brush after each use, regardless of whether you take a break or simply throw in the towel. However, crust forms quickly around the edges, and this crust can ruin your workmanship. Thankfully, all it takes is a pair of scissors to trim the crusty parts off.
DIY storage can
We previously stated that roller brushes tend to dry up around the edges if they are left out in the open for an extended period. So, what are you meant to do if you're winding down for the day or taking care of an urgent matter?
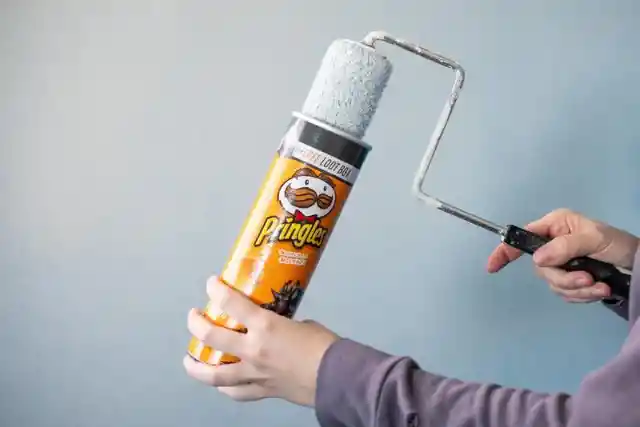
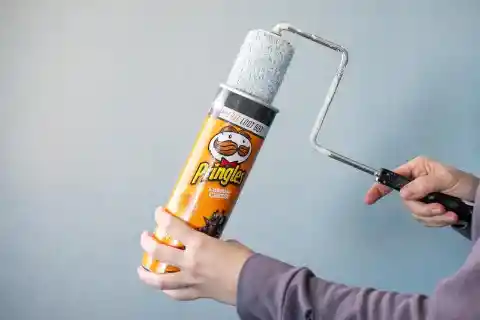
You'll be able to put your mind at ease once you discover this brilliant tip. Slip the roller into a Pringles can, wrap the can in plastic, and seal it tightly. You’ve got the perfect temporary storage device for your roller!